Sonax 236941 Ceramic Coating CC36 Review
- The spray-on application process is incredibly time-efficient.
- Instructions are very easily comprehensible.
- The protection against hazardous conditions is commendable.
- The gloss coat enhances the shine of the paint.
- Even if the paint loses its integrity, it won’t compromise on the shine.
- The base coat is not enough to fully cover the vehicle.
- More suede cloth pieces need to be added.
Verdict
The price tag isn’t friendly for the number of years they claim to protect your car. Moreover, there needs to be more suede pieces of cloth added to this kit. However, if you are someone who prefers the ease of application and want to take no hassle, this is the exact kit you are looking for.
Sonax 236941 Ceramic Coating CC36 Review
Box Contents
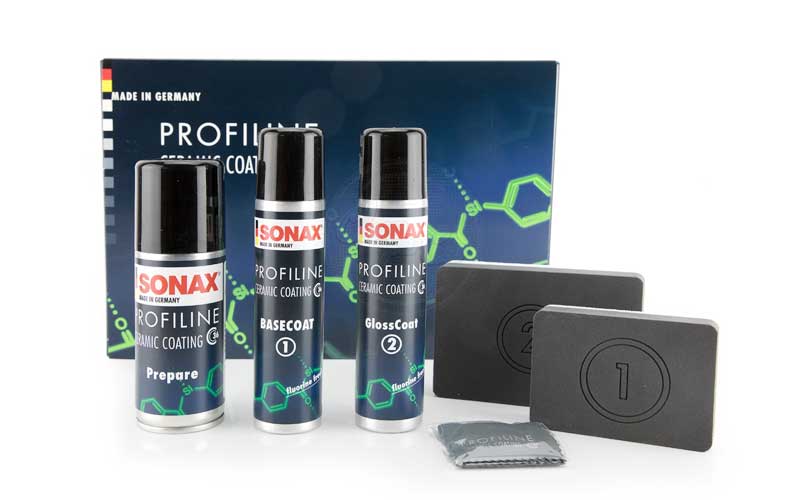
Hold on to your hats because the Sonax Ceramic Coating CC36 is a ride. If you were expecting to open the box and be introduced to a bottle of solution, think again. The box contains:
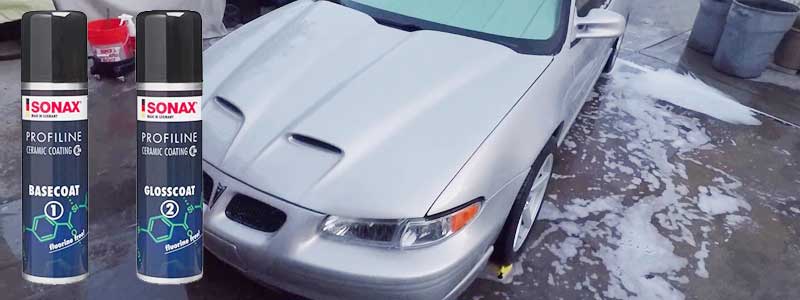
- One spray bottle of Gloss Coat
- One spray bottle of Base Coat
- Sponge application bars marked for each step
- Gloves
- 1 suede microfiber
The presentation of the box is quite appealing. It’s like unboxing a toy. Minimal design with light and dark accents is quite eye-catching. The box inside has indentations for each of the tools. It looks kind of like puzzle pieces.
Right off the bat, you’ll notice that there are 2 spray bottles: one for a glossy coat, and the other for the base coat. Step 1 of the process is Base Coat. This lays on the foundation in between paint molecules to create a surface area for the gloss coat to latch on to, which is Step 2.
There are 2 sponge application bars marked 1 and 2 included in the kit. When you have to apply the base coat, use the applicator 1. Oh, be sure to wear the gloves that are included. They’re standard black gloves that look professional and get the job done in the process.
Once you’re done with the base coat, use the suede cloth to wrap the sponge applicator marked 2 and spray on some gloss coat. Use the wet applicator to apply a coat of nourishing and illuminating shine to bring out the lackluster vibe of the paint to life.
Features
The spray can application is a revolutionary method introduced in the market for those who want to enjoy DIY-ing but in a much more relaxed way. You’ll often find that the quality of a product seems to falter in order to give you the comfort you want. That is definitely not the case of this kit.
You see, the hard shell gel coating that forms, is the gridlock protection against perilous weather incidents like acid rain or other chemicals. UV rays are kept at bay and your paintwork remains intact. Dirt, salt, road debris, soot, mud, grime, tar, etc. have nothing on the protective sealant.
It can rain all it wants but there will be no water spots spotted. Thanks to its self-cleaning characteristics, water slides off the body like marbles dropped from an elevated height. Bird-droppings are actually laughable because you can either wipe it off or hose it down. No harm will be inflicted on the paint.
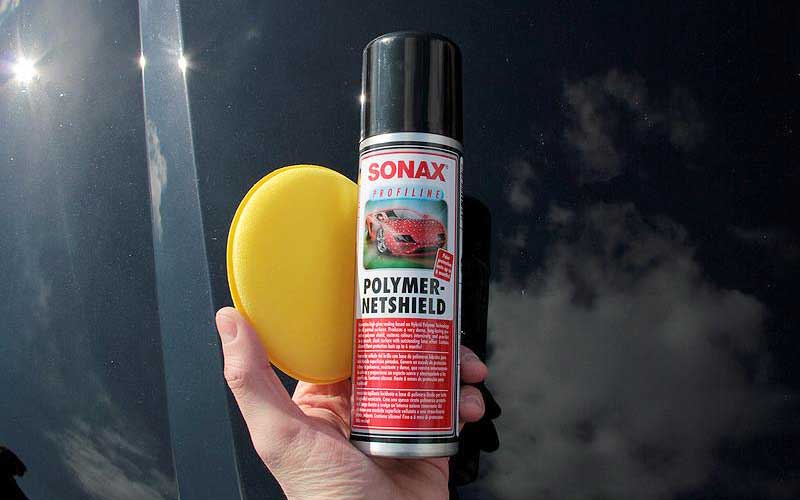
Sonax Ceramic Coating CC36 provides protection for up to 12 months. However, if you pair it up with the Sonax Polymer Net Shield, you are bound to get at least 3 years’ worth of security. However, it’s always good to change the coating every 2 years or so in order to make sure that the paint doesn’t start yellowing.
Application
The application of Sonax Ceramic Coating is so easy, even a toddler could do it. Hey, no! Don’t let a toddler near this, though.
Jokes apart, besides decontaminating your vehicle and drying it down, there isn’t any part of this that is physically exhausting. Just spray on the base coat directly on to the panel, wipe vertically and then go over by wiping horizontally. This ensures that the base coat is pushed deep into the flesh.
Wipe down any excess and move on to the next step.
Once you’ve completed the basecoat, let it rest for an hour before you apply the gloss coat. Wrap the sponge bar with the included suede cloth in the kit and spray the gloss coat directly to the sponge and cloth combo. Make sure you are holding the applicator away from the car.

Apply just like the basecoat, really buffing in the product. If it looks cloudy at first, that’s normal. No need to fret. Wipe down again and let it cure for about 48 hours. Keep in mind that the car should not washed for the first 3 days. Keep it indoors until the sealant is locked in the body surface.
It is to be noted that the base coat and the gloss coat aren’t of the same proportion. The gloss coat is not enough to cover the entire car, so you might have to buy additional amount.
Final Words
The notable part is that Sonax Ceramic Coating is extremely easy to apply. You don’t even need to read the instructions. They are so visibly well conveyed, that you’d hardly turn to the manual to seek guidance.
Yes, this kit has its fair share of lacking, it makes up for it with brilliant performance. But for some users, the cons can be overwhelming. If you are alright with buying a separate kit to get the gloss coat or even buy a different brand, that’s absolutely fine. That is generally what the users do.
The best advice will come from your close friends or family who have put this to use. Ask to pick their brain for some feedback before you go on to purchase this.
This is a really good gift for a novice car enthusiast. So, if you have a niece or a nephew who is taking their car to college, give them the ultimate motivation to be extra careful of their cars!
Share this content:


Post Comment