How To Remove Car Bumper Scratches – Step by Step Guide
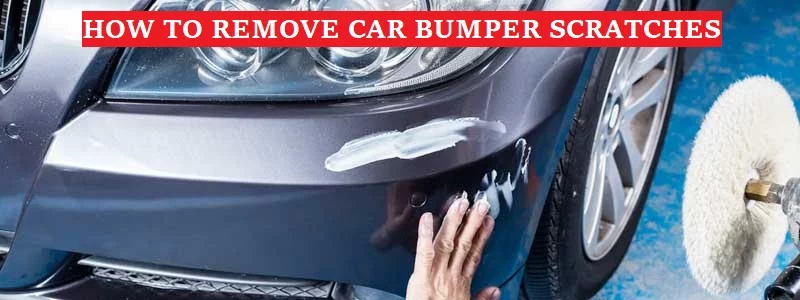
In your daily routine, getting random scratches upon the bumper of your vehicle is unsightly easy to get and to be honest, quite inevitable if you drive your vehicle around often or park it in public parking, it’s pretty likely to have a bumper partially covered with scuffs and scratches.
As a solution, many people rush to mechanics or auto-workshops to get rid of these scratches. However, it’s not always the recommended thing to do as it can cost you a hefty amount and doesn’t take any rocket science to fix.
So, here we are going to show you in detail on how to fix the scratches built up on your plastic or fiberglass bumper on your own in a fraction of money and time.
Because there isn’t one single way to get the job done, we’ll guide you through all the possible ways and guide you what’s best for you and what should you opt for.
1. Using Scratch Removal Product (For Medium Scratches)
If the scratches are not that grave, you can easily fix them by buying a scratch removal kit from any local auto-shop. The kit usually comprises of a solution that has to be applied to the body to remove the scratch, and a pad to apply the solution onto the body.
For buying the kit, you can ask around from local shops about what brand delivers the best quality there and will be best for your vehicle. However, keep in mind that this technique is only recommended for minor to medium scratches.
- Apply the amount of the solution according to the severeness of the scratches you have. Usually, a quarter portion of the applying pad is filled with the solution.
- Evenly distribute the solution on the applying pad.
- Start rubbing the scratched surface by rubbing the pad on the surface. Cover the entire area in every go of applying that is scratched. You can either go in back and forth motion or a circular fashion.
- Make sure you apply an adequate amount of pressure while applying but don’t be hard enough to damage the surface.
- When you’re buffing the surface for enough period of time, the solution will start drying up, and you will start seeing the results. Once it dries up and the scratches are taken care of, stop buffing.
- Clean the residue by using a microfiber, unless not already specified by the product. Make sure to use a microfiber to be gentle on the surface.
- However, if you’re all done by the process and the solution is also dried up, but you still see a decent amount of scratches on the body, feel free to repeat the process. You can repeat it for like 2-3 times till you feel satisfied.
- If you don’t feel like you’ll be satisfied even after going more than three times, don’t go for this option as we already mentioned, it should only be preferred if the intensity of the scratches isn’t huge.
2. Using Toothpaste (For Small Scratches)
This technique is used if the scratches are relatively small. You can easily check if this would work for you by running your nails through the scratches. If you can reach the depth, stop considering this option right now and skip to using the first option, using a scratch removal kit, however, if you feel like scratches are still deeper to fail even the scratch removal kit, then its safe to use paint to get rid of them, which we will see later in the article. So, let’s see how to get the job done if the scratches are small enough.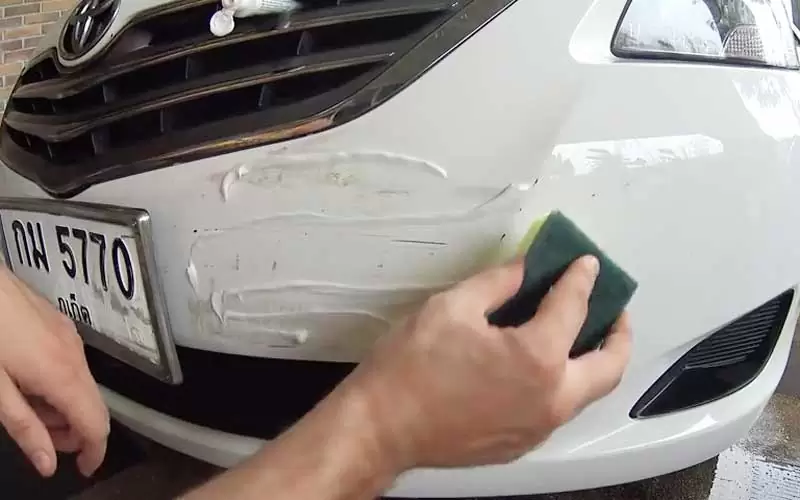
- Before carrying on with this method, make sure the surface you have to clean is free of any dirt or something. There should not be any debris on the vehicle as well.
- You can get a quick car wash or do it yourself.
- Wet the car throughout and apply a soap then rinse it off to get it cleaned.
- Dry the surface fully once you’re done washing it.
- When it’s fully dried, use a microfiber towel and apply some toothpaste to it.
- Fill up almost 20%-30% of the microfiber towel with the toothpaste. However, make sure that the towel is already damp; otherwise, the toothpaste would get too thick and won’t do the work properly.
- Start scrubbing the surface of the vehicle in a consistent way.
- Keep doing unless the toothpaste starts drying up.
- Rinse off the excess toothpaste using a water stream to get it off the surface.
- You can also do this by using a separate microfiber cloth, be gentle on the surface though, to avoid any surface damage.
- Remove the process at least two times when it fully gets dried up.
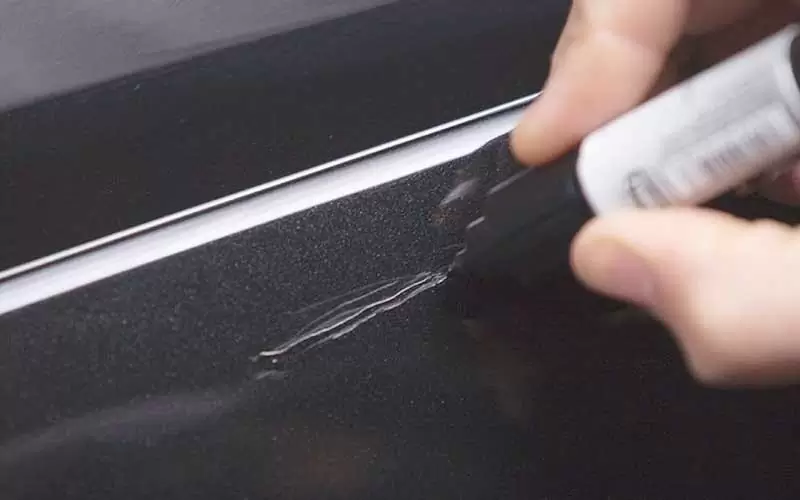
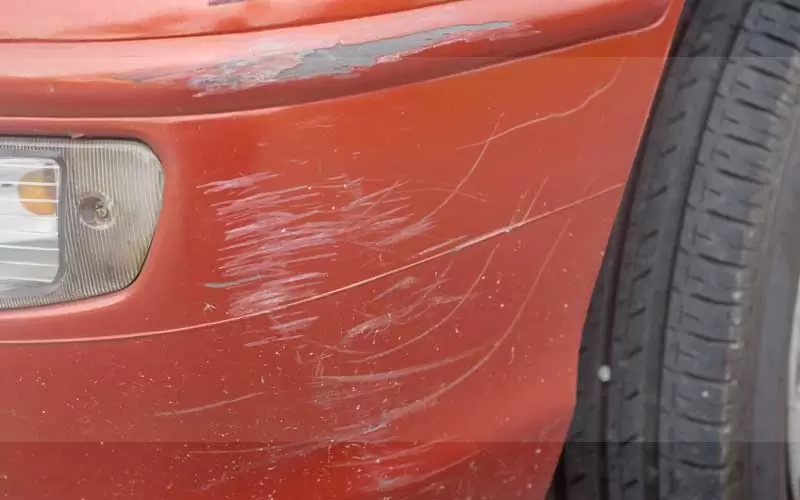
3. Fixing Deep Scratches Using Paint
Last but not the least, irrespective of how grave the problem might be, this method of fixing the scratches built on top of your bumper will always work no matter how deep the scratches might be. So, let’s see how to implement this method and get a brand new bumper of your vehicle.
- First of all, you need to repeat the step we saw in the other two methods. Clean the area that is supposed to be fixed. Make it free from any dirt or debris. Give the vehicle a wash if necessary.
- If the scratches are deep, you may want to do more than just washing the surface as the dirt may be stuck inside the scratches. And if not cleaned, they could ruin the process. You can rinse the area if needed.
- Once fully gotten rid of the dirt, use sandpaper to get off the top layers of the paint. This is done because later you will need to apply paint to get rid of the scratches. So, making it even is an important part here.
- Do not apply the sandpaper however in a direction opposite to that of the scratches already present as this is bound to leave you with even more scratches, and make sure that the sandpaper is mildly wet/damp, not fully dry.
- Once done with applying the sandpaper, rinse the surface again so that you totally get rid of all the impurities that still reside in those scratches. Now you’re fully done to proceed to the real thing where you’ll actually get rid of the scratches.
- Prior to applying the paint, one last step left to do is using a primer. Do not, however, use the primer on an area you haven’t properly applied sandpaper to.
- Try to find a primer that is as close to the actual color of the car as it could be. Don’t stress out on it as you’re still going to have to apply paint on it later, but still, it makes some difference.
- When you have fully applied the primer to all the area needed, allow it some time to fully dry, it should take around 10 to 12 minutes to dry off.
- Repeat the process four times to make sure the primer is fully applied.
- Now, carefully examine the paint color of your vehicle to buy an exact same shade of the paint you’re going to apply. If not sure, you can refer to your car manual. This step is quite important as if you use a different paint, it will completely mess up the appearance of your vehicle.
- You can buy the paint from any local automobile vendor.
- Now, the areas where you applied the primer before, start applying the paint as well.
- Spray the paint completely onto the body and make the work look neat.
- Apply several coatings and keep repeating until you get satisfied, and it completely gets impossible to point out any difference in where you applied the paint to.
- Allow some time for the paint to dry between every application.
- Now, for the final step, you need to make some final arrangements and make sure you put a protective layer upon the layer of paint you applied to be sure that it stays there for a long time.
- This is done by using a good quality wax on the surface of your vehicle.
- Buy a reputed wax and use a microfiber to apply it on the areas you just painted.
- Don’t apply too much pressure on the surface to avoid any damage being done.
- Keep buffing the wax onto the surface until it fully gets absorbed by the surface.
- If you feel like there is some extra wax on the surface, do not hesitate to wipe it off, the extra amount only!
- Once you feel that the surface has got shiny, the work is done and you will be able to see that all scratches are gone and you’re good to go.
Share this content:


Post Comment