How to Prepare Car for Painting (Easy Complete Guide)
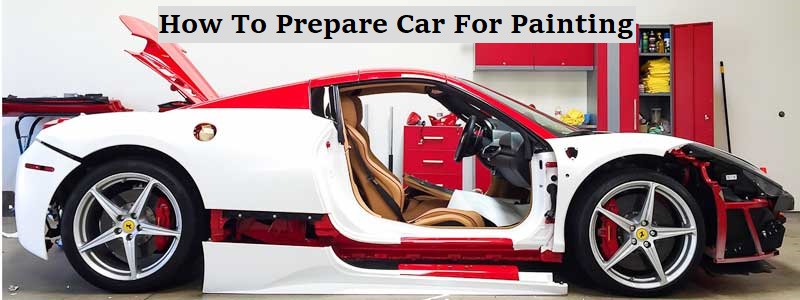
Painting your wall is easy. You can just grab a can of paint, some rollers, and get started right away. However, the car painting process is a lot more complicated than that.
Painting your car requires a lot more efforts and materials. This is the reason why the cost of getting your car painted costs a little too much.
Before you actually paint your car, there are some processes that you have to go through to prepare your car for the actual paint job.
The finished product will depend entirely on; however, you choose to prepare your car, and how do you paint it.
This is why during a paint job, 90% of the time is spent on preparing the car for the painting, and only 10% percent of it is spent on the actual painting.
You have to make sure that you spend time on these processes. Otherwise, your car will end up looking like a hot mess.
Painting your car may require some skill, but you can still take it upon yourself to get the job done. Giving your car a new look, all by yourself, will feel nothing but rewarding!
List of things you will need
The first thing that you need before you start your car prep, is the willingness to spend time, and active determination.
The process of car painting can take anywhere from a few days to a few weekends, so you have to look for a place, like a shed or a garage, that is shielded from harmful elements.
Your painting area should be covered, secure from rain and sun, and should not be too hot or too cold.
Once you are through with preparing the painting place, you can move on to gathering the tools that you will need to get the job done.
These materials include sandpaper, face masks, paint thinners, safety glasses,
If you can afford a dust extractor, it will be better to get one. It is not a necessity, but getting one will help in keeping the air debris-free.
If the size of your car is from small to medium, you will have to secure at least one gallon of primer or base coat, two or three gallons of clear coat, and three gallons of topcoat.
If the size of your vehicle is large, you will need one and a half-gallon of base coat, three or four gallons of clear coat, and four gallons of topcoat.
I am mentioning the amounts that are more than what professionals will need or use. You might not need as much either.
However, it is better to have more paint than you need than to have too little. So these are the amounts that are secure to proceed with.
1. Cleaning the work area
After gathering all the supplies you need, you have to work on preparing your work station. You have to clean this place the first thing.
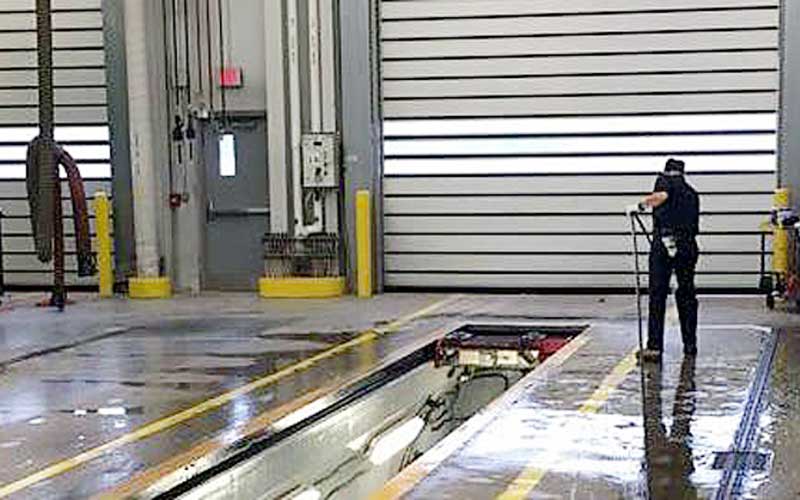
If you are planning to carry out the task in your garage or your shed, sweep the floors to make sure you have space that is good enough for you to work.
If there are any obstacles, they will only make your job more difficult, never easy.
If you are not planning to work in an enclosed space, and would rather take the job outside, hose down the area. Doing so will settle the dust.
Do not paint your car under a tree. As there is a risk of something dropping onto your car from the tree. This will ruin the finished look of your car.
Decide what part of the car you are planning to paint. The more you have to paint; the more complex the job will become.
If you have to paint the engine bay, you will need more mechanical skill, because you would have to remove certain parts of the engine and put them back together again.
2. Decluttering
The process of removing everything from the body of the car is an essential step towards ensuring a quality paint job.
If there are any items on your car like antennas, emblems, door handles, non-painted parts, or any other items that are not a part of your paint plan, remove them.
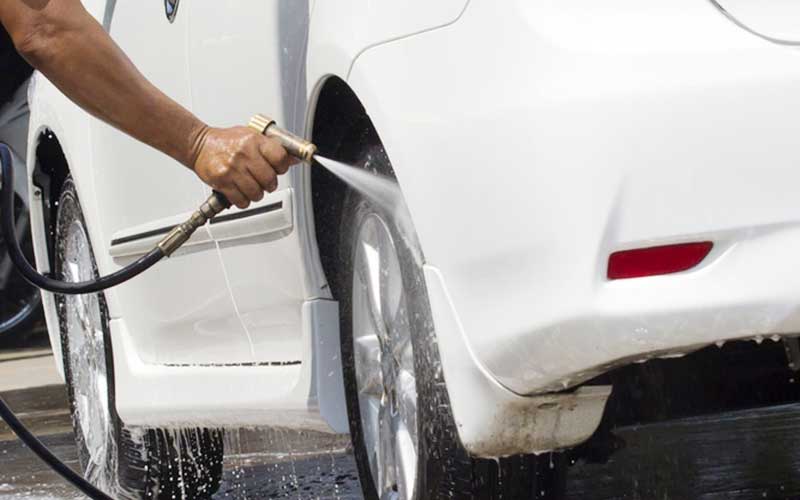
3. Washing
To get rid of the dirt and dust before you paint the car is an essential step. You do not want a layer of debris in between the surface of the car and the layer of paint.
This will make your paint job the opposite of beneficial for you. Because this way, the dust will be allowed to settle on the surface of the car, and get its job done with ease.
Wash every part of the car body thoroughly. And before you move to the next step, let your car dry completely.
4. Wiping
The step that comes after washing your car is wiping the car surface clean. You can use grease remover and wax to accomplish this purpose.
The remover but be any one of these, oil, wax, or silicone-free. This process is a must after you wash your car, and before you apply the primer.
5. Checking the quality of surface
The layer of paint that you will put over the old one isn’t going to cover the flaws that are present on the surface of your car.
In fact, doing so is going to make the painted car look a lot worse than how it looked before the paint job.
If you paint over dents, scratches, or rock chips, it will look too ugly. You would have wished you hadn’t painted instead.
If you don’t want them to look too evident, you would have to make the surface of the car as smooth as a feather before you proceed to paint it.
Feathering is a process in which you have to sand the surface of the car, all the scratches and chips on it to such an extent that when you run your hand over them, you do not feel them.
You also need to pull any dents there are if you want the surface to be smooth and flat. You will be explained the feathering process in the next few steps.
6. Stripping
The first step in the feathering process is stripping. For this, you will require sandpaper. Stand right next to your car, and start sanding in circular motions.
Sanding is going to remove the clear coat, the topcoat, and the base coat. You can use a sander for this purpose as well.
But the sander is not capable of reaching every nook and corner of the surface. So you will have to do that by hand, nonetheless, using sandpaper.
If you want to achieve the best possible result, you would have to sand the car till the surface is reduced to bare metal.
By doing so, you will be providing the new coat of paint, a perfectly smooth surface that it can adhere to.
Make sure you spend a sufficient percentage of your time on this step. This is the step that requires most of your time and effort.
If you have to get the job done in a limited amount of time, make sure you make the surface as smooth as you can.
7. Removing rust
If your car has a patch of rust resting somewhere on the surface, it will spread and damage the paint entirely.
As we have already established, there must be nothing between the new layer of paint, and the surface of the car. Especially something as dangerous as rust.
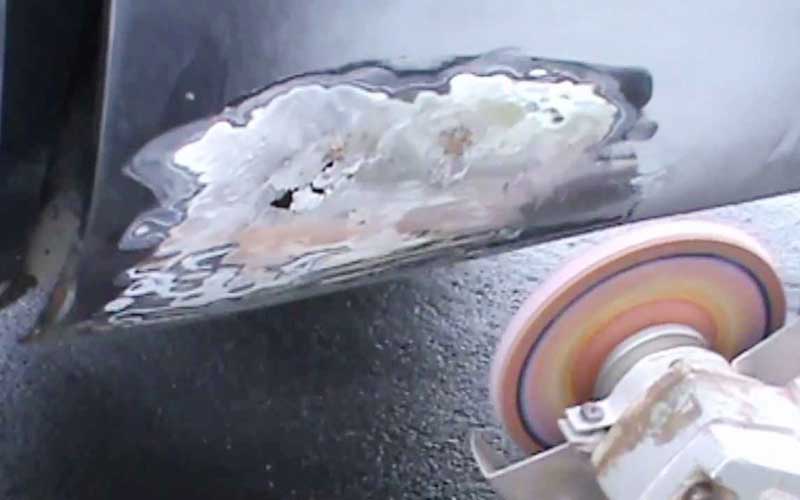
If you notice rust on the surface of your car, make sure you immediately remove it by sanding the area with special attention.
If you are not able to remove it completely just by sanding, get spray-on rust killers to get the job done for you. These are for when the surfaces are severely rusted.
You have to leave these rust killer sprays on for at least 48 hours. You shouldn’t be moving on to the next step if you haven’t given them their time to act.
8. Wiping the surface again
Once you have exposed the surface of the car that is most appropriate to be painted on, you have to remove the excess dirt and debris.
Use a clean rag, or paint thinners, or both to clean the surface of the car. This will help remove any dust. Wait until the thinners have evaporated completely before you move onto the next step.
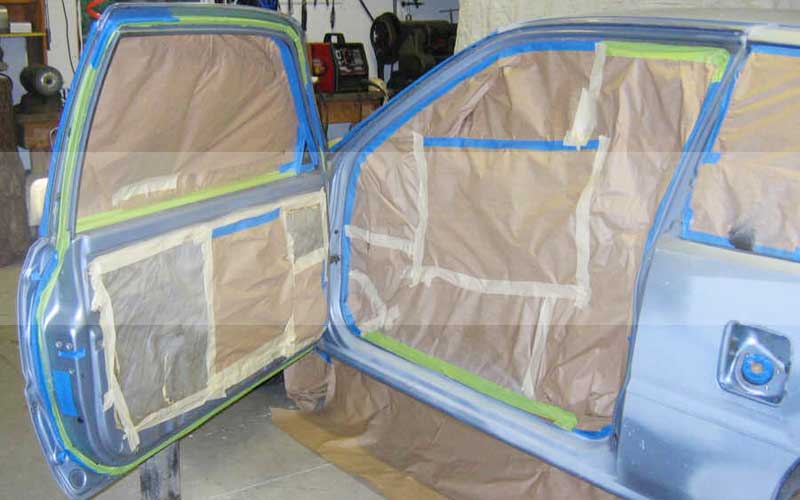
9. Priming
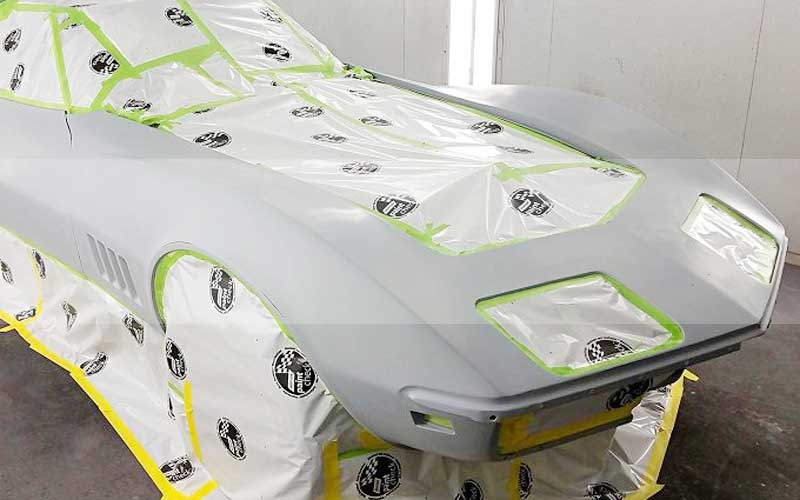
If there are any areas that you don’t want to paint, either remove them or cover them. Mix the primers and the thinners together.
Refer to the instruction manual if you want to achieve the correct proportion. And use the amount that you have been provided with, earlier.
Before you begin to paint, you would need to get your hands dirty on something else, even if it is for a little while.
One good way to practice is to get yourself any spare, cheap scrap of metal, either lying inside your house or from the junkyard.
When you have your painting technique mastered, start with applying primer on the car. Work down from the roof, using thin coats.
Hold the spray gun at least 6 inches from the surface of the panel. You would want to apply the primer in a side to side motion.
Apply the trigger only when you continue to move the spray gun. If you are holding the trigger down without moving the gun, the spray of paint will be continuous.
This will make the layer thick on that point where you are holding the trigger down. And the paint will trickle down.
Keeping the coats thin is going to make it smoother to apply, and also make it look even, avoiding blots. On every panel of your vehicle, it will take you 10 minutes to apply the primer coat.
You will need to apply more than one coats of this primer. Leave a 20 minute to an hour gap between the coats. This is the minimum time you must be given between the coats.
After you are finished with the primer, it will have a powdery touch to it. You will need to smooth it again, with a sandpaper.
10. Painting
You are finally ready to paint now. Use the instruction manuals to mix the paint and the thinners in appropriate amounts.
Use the same spraying method that you had used when you applied the primer to the surface of the car.
Just like the primer, you would need 10 minutes to paint the panels of your car, and you would have to wait 20 minutes to an hour between different coats.
Apply minimum three, maximum of three coats of paint to your car. Before the last coat dries up, remove the covers of the areas that you covered earlier to avoid getting paint on them.
Make sure you take enough care not to let the tape touch the wet paint. You can, after that, let your car sit in order to be dried.
Inspect the car after it has been painted entirely, in case of imperfections. In case you notice any, you can always sand the affected area and repaint.
Is painting over old paint of the car a good idea?
This is the most common question asked by people when they set out to paint their car. The answer to this depends totally on the status of the existing paint of your car.
If your paint is old or bad, that is, if it has cracks, scratches, or is peeling off, then you would have to remove it entirely.
Because, as we already know, that painting over them will only make them look worse. The existing problems that you had with your paint will only become more prominent.
If your old paint is somewhat respectable, and not too worn out, then it is okay to paint over it.
Conclusion
With the help of this guide and a little bit of care, it is possible to achieve a decent DIY paint job. This will not only save you money but will also give you a sense of accomplishment!
- 10 Best Fog Lights Review – Top Picks and Complete Guide
- 10 Best Fender Flares Review – Top Picks and Complete Guide
- 11 Best Tow Strap Review – Top Picks and Buying Guide
Share this content:


Post Comment