How to Paint A Car – Step by Step Complete Process
Painting a car is not as easy as it seems. You can’t just pick a brush and start painting your car. You have to take care of a lot of things before even start to paint your car. We will be talking about all the steps necessary to paint a car.

Steps to painting a car
- If you have an experience of painting a wooden door or a window, you can relate it to painting a car. It is the same. You need to sand the door or the window before applying the paint and then paint it evenly and wait for it to dry.
- We will be talking about the process step by step. You cannot skip any step to execute the task faster. Skipping any one, the step may lead to failure and undesired result. You strictly need to follow each and every step in the exact same order.
- Painting a car requires a suitable environment with zero dust around and excessive moisture which means that you cannot paint your car in the open air. You need to have a closed room for this purpose; a room with no dust and extra moisture than required.
- In a suitable environment, suitable tools are also required. There are a number of tools that are necessary to paint a car; a tool to sand the vehicle, a tool to paint it, a tool to protect unwanted areas from being painted. All these tools help to entirely paint a vehicle and complete the process successfully with desired results.
- Additionally, we are going to be talking about the rust spots and the right way to deal with those rust spots. You cannot directly paint on those rust spots if you want your paint to stay there for a long time. Treatment of those rust spots is very important, and there is a proper way to treat them.
- It will be followed by discussing the way to get rid of dust particles if any because paining a car is a very detail based work and a minor dust particle might lead to an undesired result or untidy work. We will be looking for a smooth and dusk free body of the vehicle before we start painting the car.
- Once satisfied with the dust-free body of the car, the use of sprayers will be discussed to paint the car. This is the actual step that would leave the most visible impression on the viewer. But you will still have to execute one more step in order to complete the procedure of painting your car.
The final step would be priming the vehicle. We will be talking about it in the detailed section of this post given below. All the steps are going to be mentioned in detail with the best recommendation for each task. This post will help you learn the skill of painting a car in no time.
Chapter 1: Repair damaged parts.
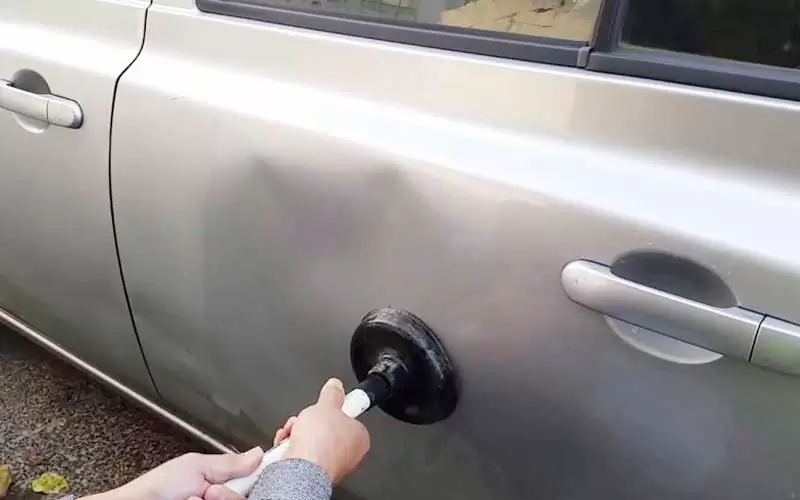
1. Pull out large dents using a dent repair kit
There are many things to take care of before painting your car. Sometimes your car is not in good shape and covered with many dents and scratches. The first thing you need to do is clear those dents because it requires a smooth surface for successful painting.
Well, removing the dents is not a difficult job. You need to main things for this purpose. Suction tool/cup and hot glue. You have to glue the suction cup to the center of the dent and wait for a while so that it gets harden. Then gently but firmly pull out the suction cup so that the dent will return to its original position.
2. Fill out gouges, dings, and depressions using a body filler putty
After your dents are removed, you might still find a few irregular areas on your car, which needs to be fixed before painting. Now, this is another easy task; you will find many body filler putties from the supply store. It is a filler material which needs to be mixed before applying. You have to mix it for a while to make it a creamy mixture. Then apply it over the uneven area with the help of a clean spreader or buffing pad. Those areas will become smooth and uniform, ideal for the perfect painting.
Now there are times when your area is not filling with these body fillers because the holes are very small for this material. To deal with smaller imperfections, there is a filler material called glazing material. This glazing putty is much thinner than ordinary fillers and perfect for filling the places which are not done by thicker fillers.
3. Sand the edges around the hardened filler to smooth it out
Actually, body filler doesn’t dry it cures via a chemical reaction. To speed up this process, you can use a hand dryer or a heat lamp. After the putty has cured completely, you might notice a few bumps on the edges. For this purpose, sandpaper is used to balance all areas.
Make sure to sand the desired area in all directions, circular and straight strokes for a good finishing.
The edges are to be sand carefully to minimize any chance of showing ridges after paint. A block sander is good for this purpose; it’s easier to use.
Chapter 2: Strip the existing finish
1. Use an electric orbital sander to remove the paint from large areas
Before you paint, you have to remove the previous paint with the help of sanding. A hand sander is not recommended for this step as it will be almost impossible to remove all the paint with it. Even the electric orbital sander takes a lot of time to remove all the paint and make the vehicle ready for the new paint, so you have to be very patient in this step.
A high-speed sander is good for this step as it will allow you to work quickly; having an electric sander is a must.
2. Always run your sander over the desired area in circles before painting
While sanding the vehicle, you have to keep in mind to apply the same pressure to all the areas, so that same amount of paint is removing from each part. Moreover, if you want a different color for your car, then you have to sand till the bottom to the bare metal so that you won’t see the old color showing from there. After each pass, you will see your paint fading away. Always use sander in a circular motion for better result and smooth area.
3. Continue to sand until no gloss is left on the vehicle
It often happens that you get tired and leave small spots of the old finish. This can cause a bad result because the automotive paints and primers don’t stick to the glossy areas that well. You have to do another hard job to make it possible. So please do this step well and ignore any small area.
Just switch off your sander and take a quick look. If there’s still some paint left, start your sander and remove all shiny patches.
4. Wipe the painting area with a clean, wet rag to wipe off any debris
After completing the sanding process, you have to move to the next step that is cleaning.
Cleaning is important to avoid any dust particles to become a hurdle in your way. The dust particles from sanding will be stuck to your fresh paint, making it look awful. So a wet cloth is used to clean the exterior of the vehicle. Make sure the area is scuffed properly.
Chapter 3: Prim the body for new paint
1. Mark the part of the vehicle you don’t want to get a primer on
After you are done with the entire previous steps, you now put primer on your vehicle. But before that, mark all the areas where you don’t want to put primer. You can cover those areas with a newspaper and put the tape on the edges to secure them. It will protect that area; especially the tires need to be sealed properly before painting, so no primer gets on it.
The best way is to take your car outside to avoid a mess in a small room. And make sure to cover the lights, windows, and trunk carefully.
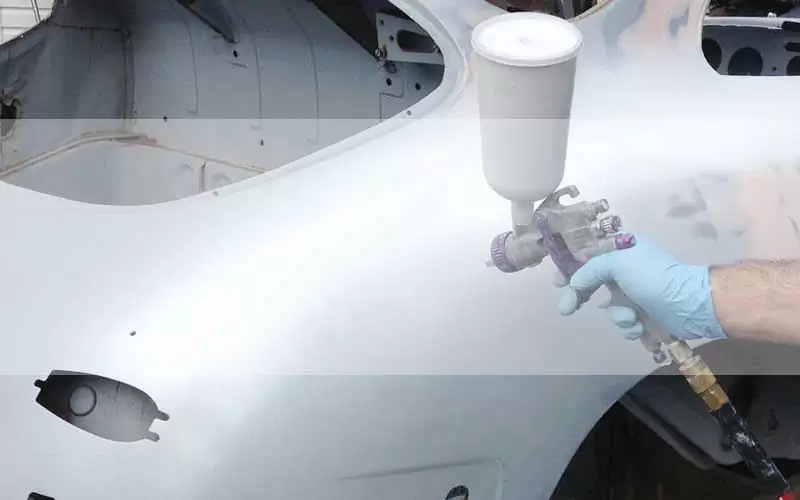
2. Apply a base coat of automotive primer using a paint sprayer
A sprayer is always useful in this regard. Priming the car with a brush or something else might make a mess and also the strokes would be easily seen. So sprayer is very handy in this situation, it spreads the primer evenly all over the area, and it makes your task easy as it will speed up the process.
The primer needs to be properly mixed for a perfectly thin coat. Also, use a good epoxy primer for your car as it will stick properly.
3. Wait for an initial coat of primer to dry
For touch-ups, a thin base coat is more than enough, but if you want a proper paint on your car, then you have to apply a few layers of primer.
But first, you need to wait some time for the first coat to dry completely. After it has dried, sanding is done for a smooth area for next coat then the coat is applied.
If you start sanding on the wet surface, then your primer will rub off, so it’s better to wait for an hour so that you don’t have redo all the hard work.
4. Block sand the base coat to smooth out
Sometimes you see visible inconsistencies and uneven spots after the first coat. A block sander is perfect for this task, 1200 grit sanding block is recommended.
Use it in curves and circular motion but don’t put too much pressure, making it even so that it matches the surroundings.
5. Prime and sand for two more times to ensure a quality finish
Repeat the above procedure 2 to 3 times for great finishing. But don’t sand until primer has completely dried off. Wait for an hour after every coat and then do the sanding for the next coat. Two to three coats are enough for your car. Finally, your car is ready for paint.
Chapter 4: Painting your Vehicle
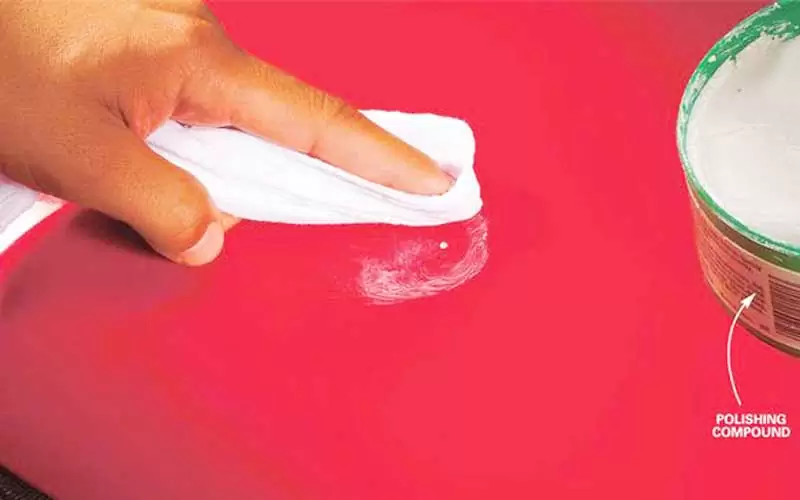
Painting is very much similar to priming. Mix the paint with thinner and apply it on the primer. Allow it to dry for an hour, just like a primer. Then apply a few more topcoats of the thin paint. Two layers won’t be enough, so buy another can if you are out of paint. Three to four coats are recommended to cover all the areas. Before the final paint, wipe your car with a clean cloth. After applying the last and final coat of paint, wipe the car again all the way down, after the paint has dried. On the A New Way Forward, you will find many ways to protect your car paint.
Tips
There are two important tips for you guys
- As mentioned above, an electric orbital sander is recommended, but the hand sander is very useful for the edges and details, where the electric sander can’t reach.
- Secondly, sometimes car shows signs of immense rust, in this situation you should go to a professional and apply a whole new coat before you can begin your painting.
Final Words
There are many steps to be taken for a successful paint. It is a time taking a job that requires hard work and patience. If you miss steps just for the sake of completing the task quickly, you might experience bad result and do all the hard work again, sometimes double hard work.
So, it’s best to read the steps carefully and follow them. Painting a car is not a stressful job; it is quite fun if you do it without any pressure. You need to have a clean dust-free workplace and all the tools necessary for painting.
After following all the steps carefully, you can achieve the professional level painting at your home.
Share this content:


Post Comment